Tutorials — ModiBot
ModiBots: Animation Part 3

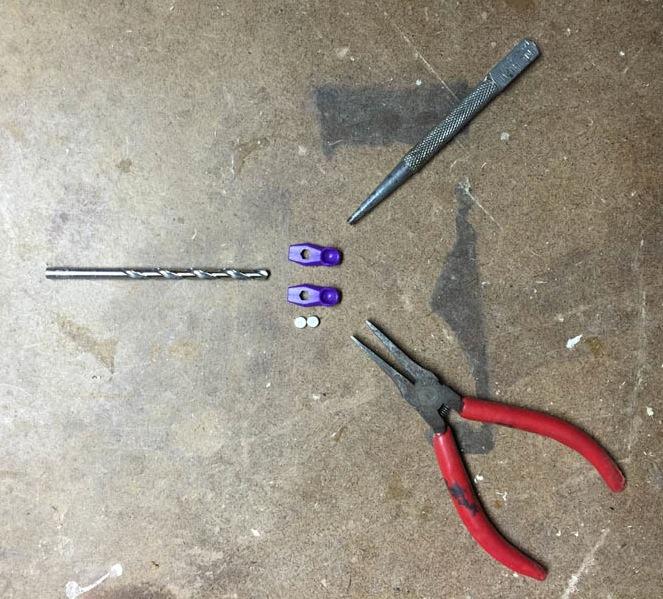
In the pre-ModiBot world, there was a line of plastic figures called Stikfas. Some animators drilled holes into the figure's foot, and inserted a small rare-earth magnet, which allowed the figure to stick to any magnetic surface. You can do the same thing with a ModiBot! The magnets used in this project can be purchased on Amazon, eBay or elsewhere. Materials ModiBot 2 x 3/16" dia x 1/16" rare earth magnets Tools Drill & 3/16" drill bit Vise Pliers, or hammer & metal punch / bolt Once you have assembled the needed tools and materials, start by securing one of...
Jul 14, 2015
Tags: ModiBotModiBots: Animation Part 2

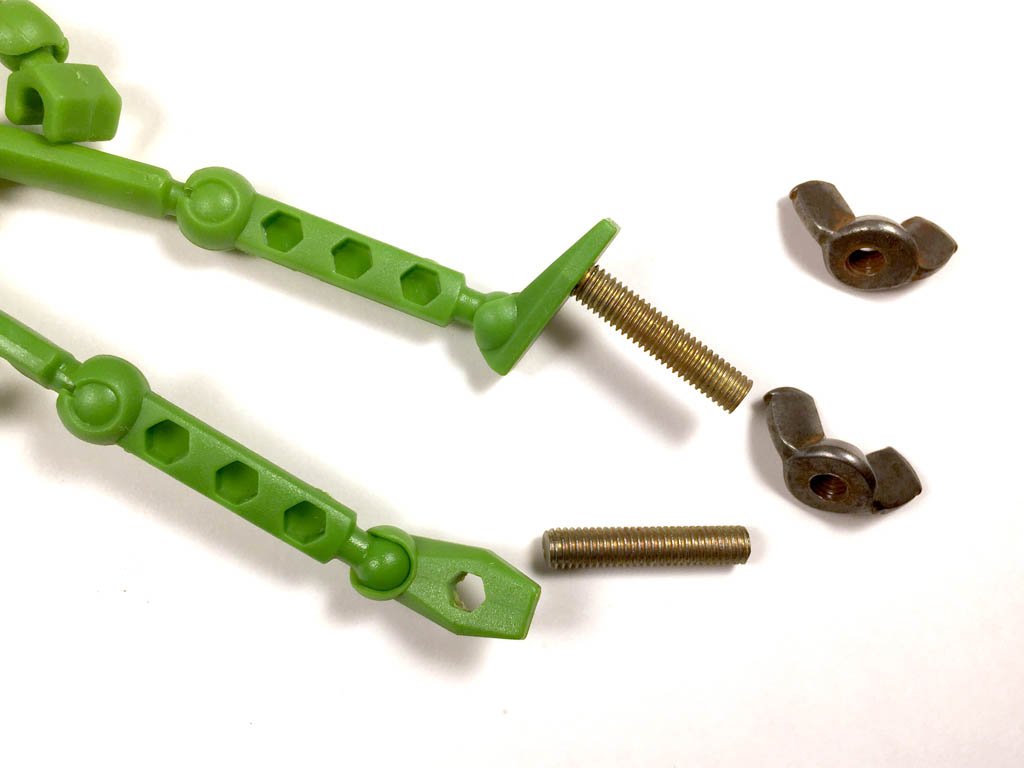
A professional stop motion armature has threaded holes in the bottom of its feet. A hole is drilled into the animation table, and the foot is placed over the hole. From underneath, threaded rods are screwed into the foot, and anchored down, typically with wing nuts. Drilling holes into the animation surface can be a pain. It makes a big mess, and you have to fill in the holes with clay after the character's foot comes up. For practice purposes, you can skip the drilling and use a pre-drilled material, like 1/" pegboard, wire screen (the kind used to construct...
Jul 07, 2015
Tags: ModiBotModiBots: Animation Part 1

If you’ve ever tried animating with a ModiBot or similar action figure, you'll quickly learn that gravity is your worst enemy. It’s very difficult to pose your figure when it keeps falling down! There are many simple ways you can attach a ModiBot to a table surface. Double-sided tape, clay, silly-putty, blu-tac and other sticky materials are great temporary solutions, and will work with any kind of figure. Tape is a perfectly acceptable way to attach your ModiBot to the ground. If the tape is clear, it's not very noticeable. Check out the video below for an example. Pro tip...
Jun 30, 2015
Tags: ModiBot